
 |
| "A STITCH IN TIME, FINISHES THE SKETCHBOOK" |
****NOTICE!! I just now fixed some "bugs" in the instructions. I hope I cleared them up! If this still isn't clear, or your threads get crossed (in the wrong way),
please let me know so I can fix it further!!!!
SO SORRY!!!****

Check the tips. You may have one or more needles with a sharp point. You have to be very careful with these because they will split your thread as you are stitching. Pulling your thread gently to the left as you exit a hole and holding it with your free thumb will open the hole and help prevent this. More as we go along. We are going to start by making our first stitches in the BACK cover. So you need to get that.


Be sure you know exactly where the top of the cover is, and always keep in mind the direction of your arrows. The holes are numbered 1, 2, 3 and 4, from the TOP to the BOTTOM, or from the LEFT TO RIGHT as you are working sideways. If you have to, make a cheat sheet that shows them in the right order in relation to the cover as you are viewing it.

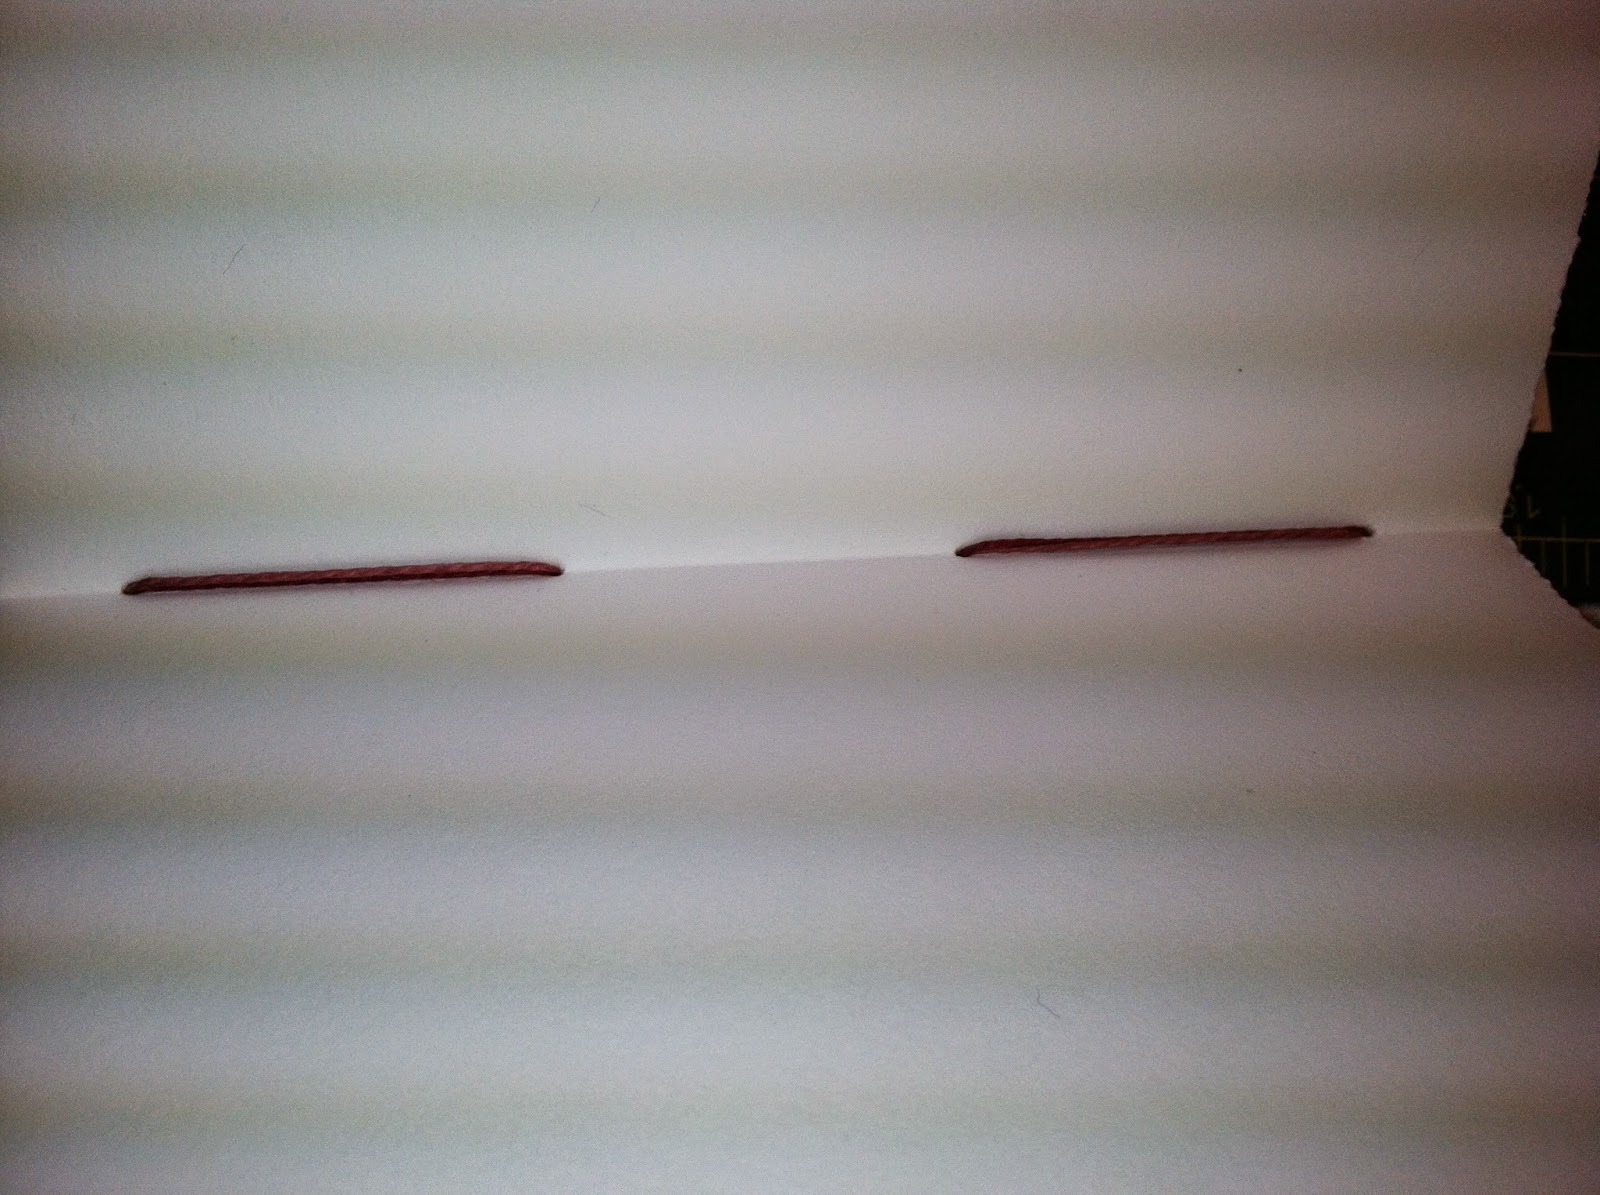
Place the open cover FACE DOWN on the edge of your table. Using your first thread, push NEEDLE ONE in through HOLE 1 and then out through HOLE 3, from the inside of the cover to the outside. Pull the threads through and let them hang down evenly over the edge of your table. Repeat this for the second thread, NEEDLE 3 in through HOLE 2, then out through HOLE 4, from the inside to the outside, evening the threads and letting them hang down.


On the inside of the cover the threads will be crossed. On the outside the colors will alternate. Now close the cover so that the INSIDE BACK is facing UP, the OUTSIDE BACK is face down and the threads are hanging down with THREAD 1/HOLE 1 on your far LEFT.

Pick up Signature #6 and place it FACE UP on the cover. Be sure the holes are aligned (that the signature is not flipped). Pick up the needle in position one and put it through HOLE ONE in the Signature. On the INSIDE of the cover, grab the needle, CROSS OVER and exit the needle to the front through HOLE 2. Tighten the thread, pull it slightly to the left and hold it with your thumb.
This action should clear the hole of the thread and help you not split it.
Come up through HOLE 2 with the second needle and thread, cross over and exit through HOLE 1.

Tighten the threads and let them hang down. You should have double threads, one of each color, side by side, laying in the crease. Repeat with NEEDLE 3/THREAD 2, crossing over to HOLE 4 and exiting, and with NEEDLE 4/THREAD 4, crossing over to HOLE 3 and exiting.

When you tighten the threads they should look like this - double, two color on the inside of the Signature, and hanging straight down on the outside in alternating colors. And the signature should be hooked securely to the back cover.

Now we will begin to make the chain. The first stitch is a "half chain" to secure the stitches.


You may find this process easier if you keep the signature on the table, and let the cover hang down, opening the gap between the two. You can then just drop your need through loop around, pick it up from underneath, and poke it right up and grab it with your fingers.


Lay the thread out over the top of signature and continue on across.
Add Signature 4 on top of Signature 5, sew in the same manner - into the signature from the outside, cross over on the inside, come out.

From now on, each time you finish, COUNT DOWN TWO SIGNATURES, make the chain around, tighten the tension on the thread, add another signature on top.

***From now on your chain should always hook two signatures together.***
Be sure to stitch your chain from the right, around and under the thread and out the left side each time. Always check your holes alignment. Continue until all signatures have been added.

Add the front cover the same way. Count down two signatures, and make the chain. Come back through the cover again, cross over on the inside, come out, then this time count down ONE Signature to end and secure the chain. Loop around and go back into the cover again. Tighten the tension on the threads.

Open the cover. Tie THREAD ONE to THREAD TWO. Tie THREAD THREE to THREAD FOUR. Clip excess thread so it does not stick out, but leave a little tail.


Wrap the cover all around in plastic - either plastic wrap or some other other wrapper. You want to make sure any glue that is squeezed out during pressing will not get anywhere but onto plastic. Do the same glue and plastic wrap procedure for the back cover. Carefully place the book under weights. A book press is wonderful if you have one. Most of us don't. I use a stack of heavy books (a book press made of books!) Let the whole thing set over night.


The end wraps are better, the chains are tighter and the alignment is almost perfect. I am doing a little Happy Dance !


So, how did yours turn out? Send me some pics to #fabcopsketchbook.
I hope this worked well for you and the instructions were clear enough. Be sure to comment with any questions you have.
This has been a blast, but I haven't even BEGUN my SBK homework yet! Guess I'd better hop to it!!
judi
Thanks so much for this excellent tutorial, I'm folding paper today, it may take me quite some time to do my first handmade book, but I've always wanted to try.
ReplyDeleteSo glad you are going to give it a try! YAY for YOU! When you hit a snag in my directions, and Lord knows, there must be quite a few, just message me on FB and I will try to untangle you!
ReplyDeletejudi
I didn't do a fancy cover, but I'm still quite pleased with the very first sketchbook I made myself. Here's a link to some photos of my book. Thanks again for the GREAT tutorial. http://captelaine.blogspot.com/2014/09/my-first-homemade-sketchbook.html
ReplyDelete